Quick installation of CFEngine Enterprise
Getting started tutorial
Recommended for new users
If you're a new user, or haven't already read it, we highly recommend
following along with the getting started tutorial in our documentation.
Through it, you'll learn how to install CFEngine, explore the Web UI and
reports for the first time, download ready to use modules, and more:
Getting started with CFEngine.
The quick install shell script
cf-remote or
the enterprise download page.
Follow the steps below to install and bootstrap CFEngine:
Check the requirements
CFEngine hub
- 64-bit machine with a recent version of Linux
- 2gb of memory
- 100mb of disk space per host you plan to connect to
- Ports 5308 and 443 must be open & hostname must be set
CFEngine client
- 32/64-bit machine with a recent version of Linux
- 20mb of memory
- 20mb of disk space per host you plan to connect to
- Port 5308 must be open
Find the IP address of both the client and the hub because you'll
have to put them into the commands wherever we refer to
HUB and CLIENT.
Note: If your hosts have multiple interfaces (multiple IP addresses and multiple networks) it matters which one you use. When we add these IP addresses to the configuration below, it works like a firewall - allowing those IPs and blocking other IPs. In practice, this means that if you are testing with 2 hosts in for example AWS, you'll want to use the private IP address for both the hub and the client for it to work correctly.
Set up the hub
Run the following command to download and automatically install the CFEngine hub package:
wget https://s3.amazonaws.com/cfengine.packages/quick-install-cfengine-enterprise.sh && sudo bash ./quick-install-cfengine-enterprise.sh hub
If your hub and client are on different /16 subnets,
meaning the first 2 numbers in their IP addresses (IPv4 dot-decimal
notation) are not identical, you will have to specify which IP
addresses/subnets are trusted.
See the documentation for more details, or simply replace HUB and CLIENT with
their respective IP addresses and run this command on the hub:
echo '{"variables": {"default:def.acl": ["HUB", "CLIENT"]}}' | sudo tee /var/cfengine/masterfiles/def.json
With the hub package of CFEngine correctly installed and configured,
you must start CFEngine, by bootstrapping the hub to itself. Replace
HUB with the appropriate IP address and run this
command:
sudo /var/cfengine/bin/cf-agent --bootstrap HUBSet up the client
Run the following command on any machine you'd like to connect to the hub; it will download and automatically install the agent.
wget https://s3.amazonaws.com/cfengine.packages/quick-install-cfengine-enterprise.sh && sudo bash ./quick-install-cfengine-enterprise.sh agent
Now bootstrap the agent to the hub. Just like above, replace
HUB in the following command:
sudo /var/cfengine/bin/cf-agent --bootstrap HUBSet up and log in to CFEngine Mission Portal
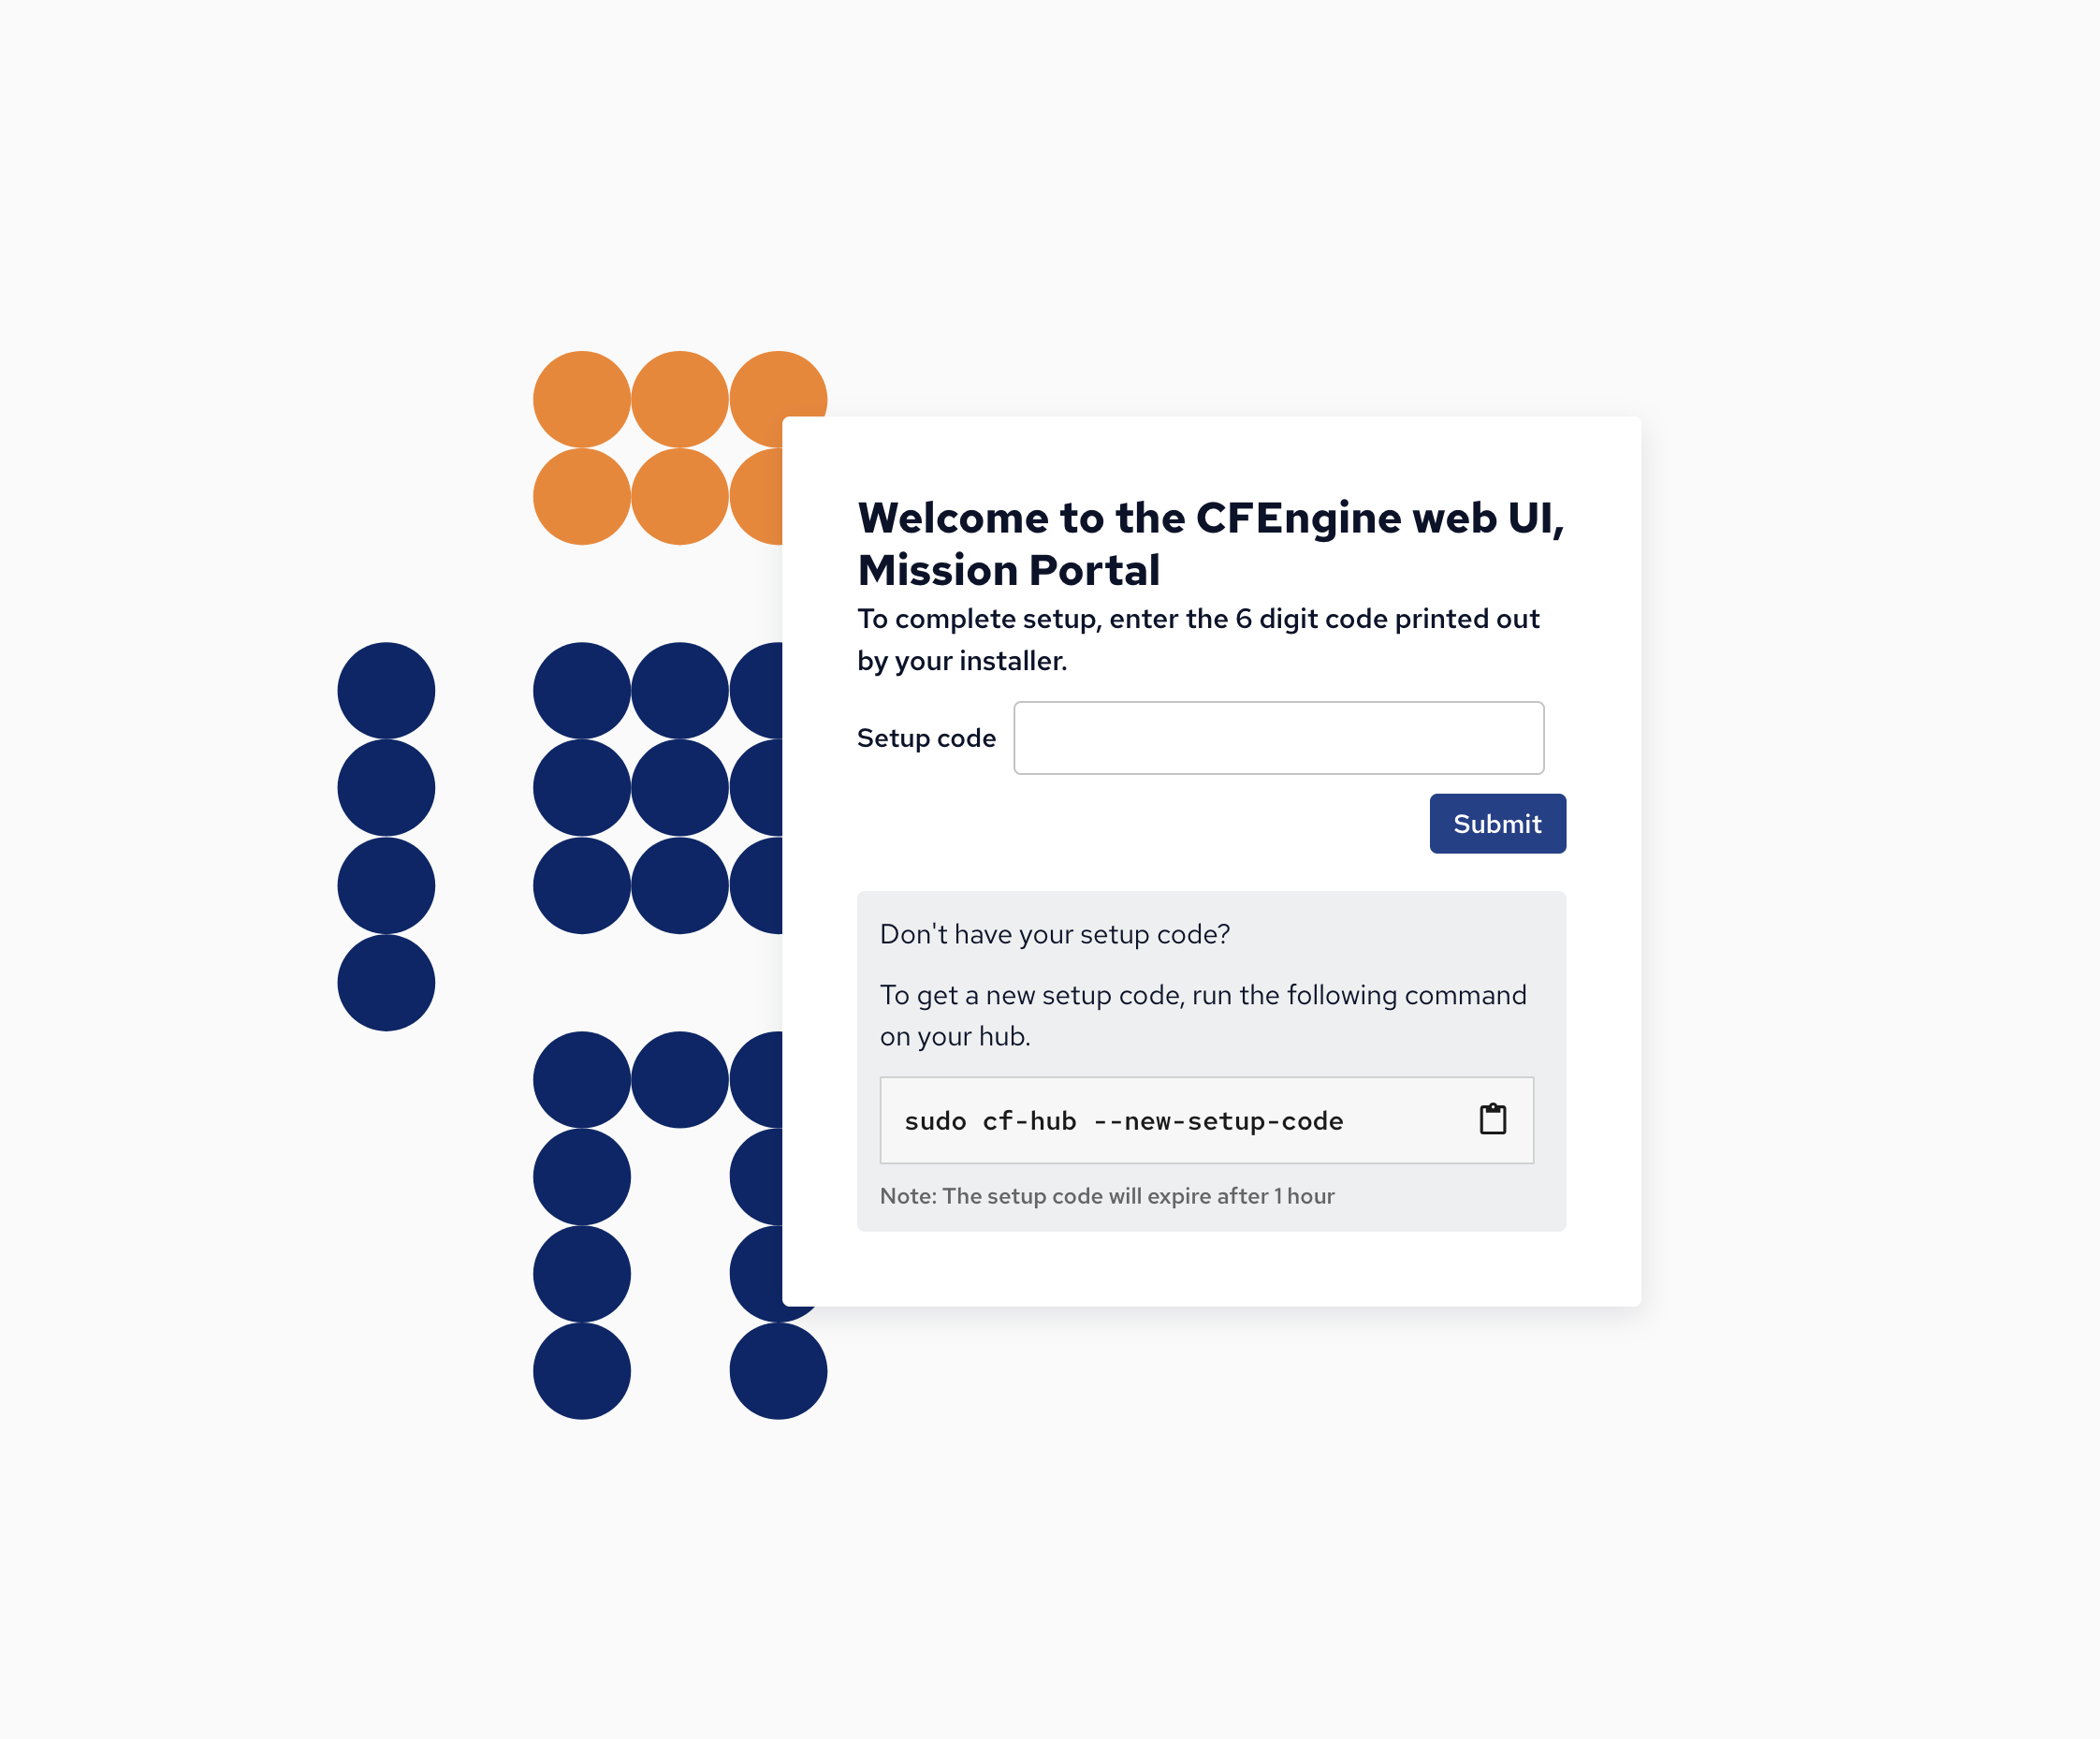
In any modern browser, visit the IP address of your hub from step 2 above. You should see the Mission Portal first-time setup page where you need to set a secret code to proceed with the setup. The code was printed in the output of the Hub installation command you ran on the hub in step 2. To obtain a new code, you can run the following command on the hub machine:
sudo cf-hub --new-setup-code
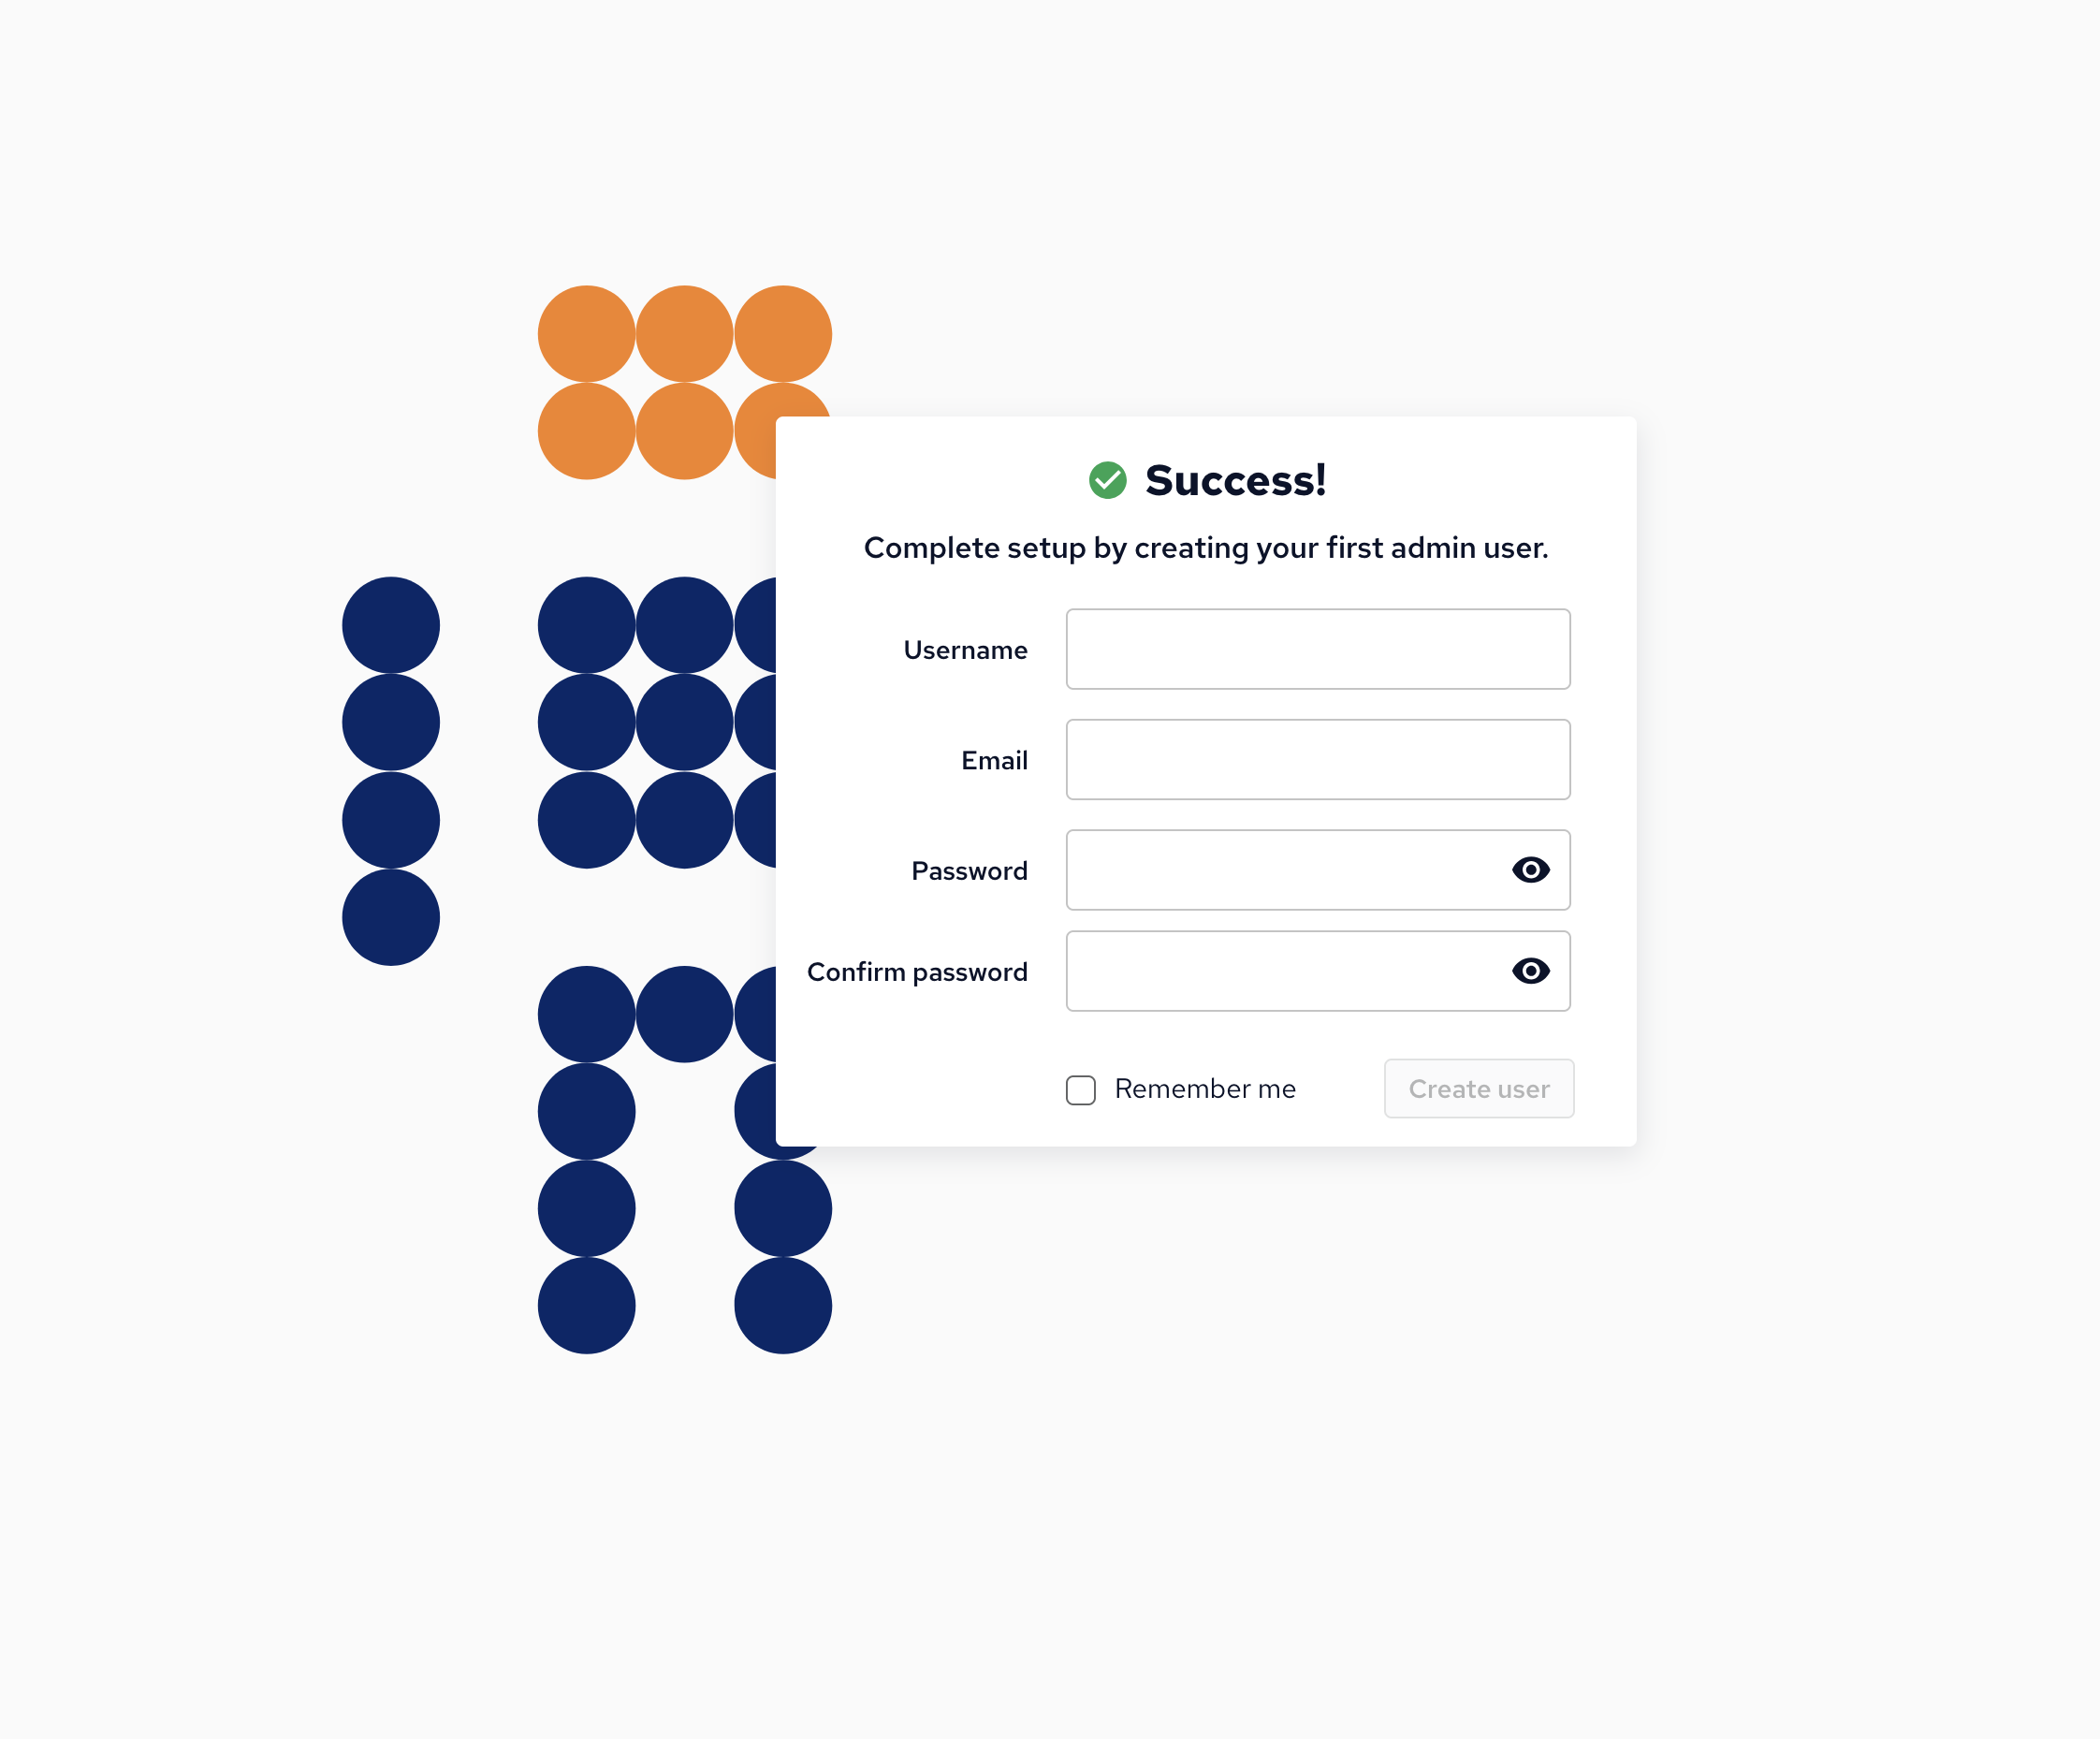
Once you have set the secret code, you will be prompted to create an admin user.
What's next?
-
Getting started with CFEngine tutorial series
(Skip the
cf-remote installcommand since you've already installed CFEngine). - Visit our developer resources page and join the community
- Contact us if you need any help


